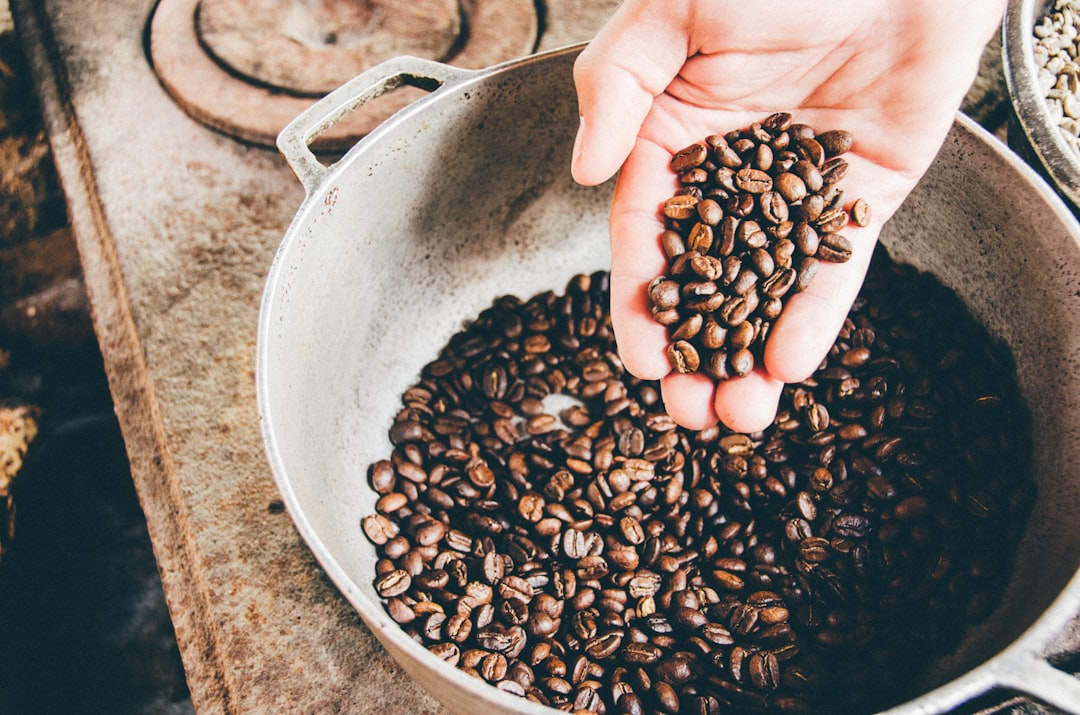
What Is a Coffee Aerator and Why Use One?
- Coffee aeration releases trapped CO2 from freshly ground beans, leading to a cleaner, more even extraction and better flavour.
- The bloom method (pouring twice the water weight over grounds, then waiting 30-45 seconds) is the simplest way to aerate at home using a Hario V60 Drip Decanter or similar pour-over dripper.
- Pressure-based brewers like the AeroPress Original naturally aerate coffee during the plunge, which is why AeroPress coffee often tastes brighter and cleaner.
- A gooseneck kettle such as the Fellow Stagg EKG gives you precise control over pour rate and water distribution, critical for an effective bloom phase.
- Cold brew coffee also benefits from aeration during the steeping process - using a Hario Mizudashi Cold Brew Pot or Hario Cold Brew Bottle allows natural gas exchange during the 12-24 hour steep.
You've probably heard the term "aeration" tossed around in wine circles - decanting a bottle of red to let it breathe before you drink it. But coffee? Aerating your brew sounds like something only a lab-coated barista with a chemistry degree would bother with. The truth is far simpler. Coffee aeration is one of the easiest ways to improve your cup, and you might already be doing it without realising.
Want to try it yourself? Follow our step-by-step guide to aerating coffee at home.
Every time you pour a splash of hot water over fresh grounds and watch them bubble and swell, you're aerating. That foamy, blooming action is CO2 escaping from the beans - and getting it right makes the difference between a flat, muddy brew and one that's vibrant, aromatic, and full of flavour. Let's get into what's actually happening, and how you can use aeration to make better coffee at home.
The Science: Why Fresh Coffee Needs to Breathe
When coffee beans are roasted, the heat triggers a cascade of chemical reactions that create the flavours and aromas we love. It also traps a significant amount of carbon dioxide (CO2) inside the bean's cellular structure. Freshly roasted coffee can hold up to two litres of trapped CO2 per kilogram of beans. That's a lot of gas waiting to get out.
When you grind those beans, you massively increase the surface area, and the CO2 starts escaping rapidly. If you brew immediately without letting the gas escape first, something problematic happens: the CO2 forms a barrier around the coffee particles, preventing the water from fully penetrating them. The result is an uneven extraction - some particles get over-extracted (bitter), while others barely get touched (sour, under-developed).
This is where aeration comes in. By deliberately giving the CO2 a chance to escape before the main brew, you remove that gas barrier and let the water do its job properly. Water hits every particle evenly, extracts the full spectrum of flavours, and you end up with a cleaner, more balanced cup. Roasters and specialty coffee shops call this step "blooming," and it's the most common form of coffee aeration.
The Bloom Method: The Easiest Way to Aerate
The bloom is dead simple. You pour just enough hot water over your ground coffee to saturate it - roughly twice the weight of the coffee grounds - and then you wait. Thirty to forty-five seconds is the sweet spot for most fresh coffee. During this pause, the grounds release their trapped CO2, visible as those satisfying bubbles and the gentle swelling of the coffee bed.
After the bloom, you continue pouring the rest of your water in slow, circular motions. Because the CO2 has already escaped, the water can now extract flavour from every particle evenly. The difference is noticeable even with supermarket beans, but it really shines with freshly roasted specialty coffee where the gas content is highest.
To get the bloom right, you need two things: a pour-over dripper and a gooseneck kettle. The Hario V60 Drip Decanter is the classic choice - its spiral ridges encourage even extraction and the large single hole lets you control flow rate. Pair it with a Fellow Stagg EKG Electric Gooseneck Kettle for precise pour control, and you've got everything you need for a properly bloomed pour-over. A coffee scale with timer helps you nail the water-to-coffee ratio and bloom duration every time.
AeroPress Aeration: Pressure Does the Work
The AeroPress Original takes a different approach. Instead of relying on a slow pour to aerate, it uses air pressure. When you stir the coffee and water together and then press the plunger down, the pressure forces air through the brew, creating a natural aeration effect. This is one reason AeroPress coffee is known for being exceptionally clean and bright - the pressure-based aeration extracts flavour efficiently while leaving bitter compounds behind.
You can take it further with the inverted method. Flip the AeroPress upside down, add coffee and water, stir, and let it steep for a minute before flipping and pressing. The extended contact time combined with the pressure plunge gives even more aeration and a fuller extraction. Many AeroPress enthusiasts swear this produces a cup that rivals pour-over clarity with less effort.
For an even more controlled aeration, consider pairing the AeroPress with a Timemore Chestnut C2 Manual Coffee Grinder. Freshly grinding your beans just before brewing means the CO2 hasn't had time to escape on its own - giving the AeroPress pressure method more gas to work with and a brighter result.
Cold Brew Aeration: Slow and Steady
Cold brew coffee aerates differently. Because cold water extracts flavour over 12 to 24 hours rather than 3 to 4 minutes, the CO2 has plenty of time to escape naturally during the steep. But the brewing vessel matters for gas exchange. A narrow-necked bottle restricts how much air can reach the surface of the water, while a wide-mouthed brewer allows better airflow.
The Hario Mizudashi Cold Brew Pot is designed with a wide opening and a fine mesh filter that lets gases circulate during the steep. The Hario Cold Brew Bottle is a more portable option that still allows decent airflow through its dedicated brewing basket. Both produce a noticeably smoother cold brew than a sealed jar, because the CO2 isn't trapped against the coffee bed.
One trick you can try: after your cold brew concentrate is ready, pour it between two jugs a couple of times. This rapid aeration (called "decanting" in the coffee world) releases any remaining dissolved gases and gives the cold brew a silkier mouthfeel. It's the same principle as aerating wine - quick exposure to oxygen softens the brew.
Dedicated Coffee Aerator Tools
If you want to go full nerd, there are dedicated coffee aerator tools on the market. These are small devices that sit on top of your cup or carafe and force the brewed coffee to cascade through air before it lands in the vessel. The idea is that the extra oxygen exposure opens up the aroma compounds, similar to what happens when you decant wine.
Do they make a tangible difference? Yes and no. If your coffee is already well-extracted and you've bloomed correctly during the brew, a dedicated aerator adds a marginal improvement - mostly in the aroma department. You'll notice more floral and fruity notes on the nose, but the flavour change is subtle. If your coffee is underextracted or stale, no aerator will fix that.
Honestly, the bloom method or an AeroPress will get you 95 per cent of the way there without buying a separate gadget. But if you're hosting a coffee tasting or want to show off at your next dinner party, a coffee aerator is a fun addition that genuinely does change how the coffee smells.
Does Coffee Aeration Matter for Espresso?
Espresso is a different beast. The high pressure of an espresso machine (typically 9 bars) forces water through the coffee puck with enough force to overcome the CO2 barrier without needing a separate bloom step. The gas still escapes - you can see it in the crema formation - but it happens during the extraction itself rather than before it.
That said, espresso does benefit from a form of aeration after brewing. Letting a fresh espresso shot rest for 15 to 30 seconds before drinking allows the microbubbles in the crema to stabilise and some of the harsh high notes to mellow. This is why good baristas let the shot "settle" before serving. It's a tiny pause that makes a noticeable difference, especially with lightly roasted espresso blends that are naturally more acidic.
So Should You Aerate Your Coffee?
If you're brewing pour-over or filter coffee, yes - absolutely. The bloom step takes thirty seconds and costs nothing, yet it delivers a noticeably cleaner, more balanced cup. If you already own a gooseneck kettle and a pour-over dripper, you have everything you need. If you don't, the Hario V60 and Fellow Stagg EKG are the gold standard for a reason - they make controlled pouring effortless.
If you mostly drink AeroPress coffee, you're already aerating without thinking about it. The pressure plunge does the work for you. If you're a cold brew fan, switch to a dedicated cold brew pot and try decanting your concentrate before serving. And if you're strictly espresso? Give your shot a brief rest before you knock it back. Sometimes the smallest change makes the biggest difference.
Products Mentioned in This Guide
- Hario V60 Drip Decanter - classic pour-over dripper for bloom aeration
- Fellow Stagg EKG Electric Gooseneck Kettle - precision pouring for controlled blooming
- AeroPress Original Coffee Maker - pressure-based aeration for clean, bright coffee
- Timemore Chestnut C2 Manual Coffee Grinder - fresh grinding for maximum aeration effect
- Coffee Scale with Timer - precise ratio and bloom timing
- Hario Mizudashi Cold Brew Pot - wide-mouth cold brewer for natural aeration
- Hario Cold Brew Bottle - portable cold brew with good airflow
Read our full best pour-over coffee makers review and essential coffee accessories guide for more gear recommendations.
Frequently Asked Questions
Final Verdict
Coffee aeration is not a gimmick - it's a genuine, science-backed way to get more flavour out of your beans. The bloom method costs nothing except an extra 30 seconds of your time, and the difference in clarity and balance is immediately noticeable. Whether you use a Hario V60, an AeroPress, or a cold brew pot, the principle is the same: let the gas out before you drink it, and the flavour follows.
If you're serious about improving your home brew, start with the bloom. It's the single highest-impact change you can make without spending a penny. Then experiment with an AeroPress or cold brew decanting to see what works for your taste. Coffee nerds have been aerating for years - now you know why.

Sam Roberts writes about coffee machines, beans and brewing gear for Coffee Nerds.
As an Amazon Associate we earn from qualifying purchases.
Last reviewed: July 23, 2026 · Evidence-based content · Contains affiliate links